Resaw Leftovers
#8
Had a few cut-offs from the November Project...decided to resaw them up/down..
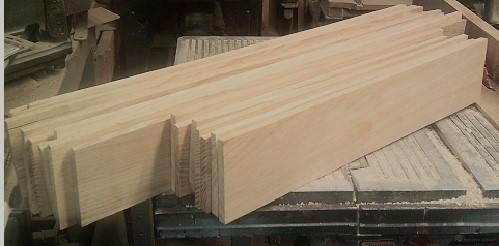
   
And, since the tablesaw was having issues staying at 90 degrees..these all went through a friend's Lunch Box Planer...so that they all were the same thickness..
   
All except this fancy grain board...tablesaw to saw a kerf, then..
   
A Cardio Workout to split it apart...
   
Planes and Beltsander to flatten this out...no way was it going near that Planer..as for the rest..
   
Wound up with about a dozen long blanks....and..
   
About 8 shorter blanks...all about 1/4" thick...
Not sure about the Live /Barky Edged stuff..
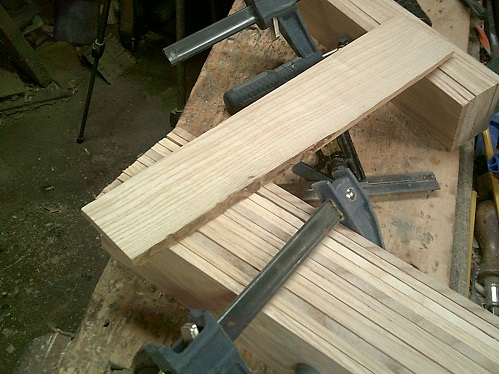
   
Might just trim it off, and save the rest for drawer parts..

Sorted through the longer blanks...
   
These 3 seemed to look good enough for one panel...and..
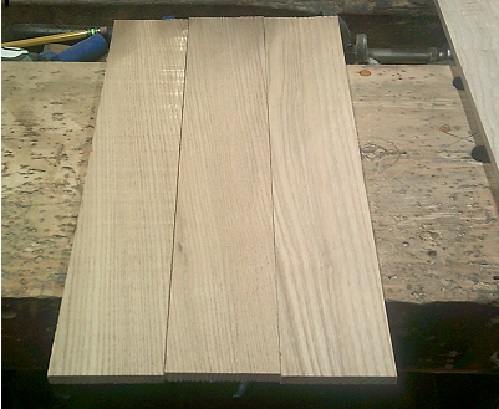
   
These could make a second panel....

Those 2 fancy panels?   One has a split growing in it..might just rip along that..and make 2 drawer fronts...
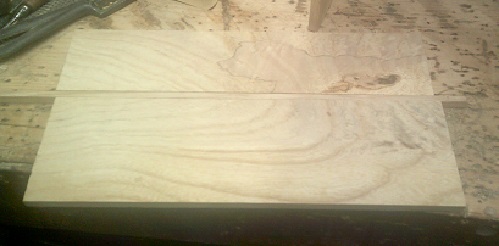
   
And the one with out the split?   Maybe the top of a case? 

Stay tuned...
Show me a picture, I'll build a project from that
Reply
#9
So what are you making now??  The last dresser project was really good
As of this time I am not teaching vets to turn. Also please do not send any items to me without prior notification.  Thank You Everyone.

It is always the right time, to do the right thing.
Reply
#10
Single Brain Cell Sketch Up has a plan, of sorts...
   
To turn this mess into  box with 2 drawers...which will involve a few cuts...Fancy glued up panel was cut into 2 sections, for the sides of the case..the non-split resaw will be the top of the case...then one with the split will become 2 drawer fronts...The plain grained panel is to be the bottom of the case...because I need to join the corners of the case with through dovetails..
   
A 1/4" plywood panel will be the back of the case..and sit in rebates..
   
The top drawer will slide in on another plywood panel, so I'll need  a dado for that..and mill an Ash strip to cover the end of the plywood..
   
Once all 4 corners are done, do a dry fit...
   
And add the strip across the front of the plywood..
   
And the plywood back...
   
Fun began with a glue up..
   
Stay tuned...
Show me a picture, I'll build a project from that
Reply
#11
You would wear out Roy Underhill trying to keep up with your project output Bandit. ;=)
You've got my curiosity peaked figuring this one out with two drawers. I need a couple of hints please.
If you continue to cut corners, you'll end up going in circles!

It's my thumb so I'll hit it if I want to!
Reply
#12
Hint:
   
Worked on the top drawer a bit, today...
   
Front, 2 sides, and a back....once the "box" has been joined at the corners...a plywood panel will get glued to the bottom edges of the sides and the back...

The front gets a rebate to house the panel..and hide it...
   
Drawer front is a through dovetail...the back of the drawer sits in a rebate on both side panels...

Glued up the box..with a 1/4" plywood panel for the bottom of the drawer....cut to fit..
   
That red c clamp?
   
Seems there was a crack in the drawer front....glue to fix...clamp and the dovetails to hold it, until the glue is done..

I also dug out a couple knobs..
   
Thinking one per drawer, centered up?

stay tuned..
Show me a picture, I'll build a project from that
Reply
#13
Up-date:  Got a bit busy the last few days, as the "Delivery Date was yesterday...soo
Front view:
   
Knobs had a 1/4" hole in their backside..I had to make a "dowel" from some square scrap..until it fit...drill a hole centered in the drawer fronts, cut the dowel tenons for length, and glue the knobs in place.
   

Side view, with the drawers slightly opened...
   
Ends of the base are angled to the same degrees as the dovetails..
   
Glued on two "glue blocks"   case is glued to these...no metal fasteners were used in this project.

Back is a bit plain...
   
1/4" plywood for the back...set into rebates.  Another plywood panel is what the drawers are sliding in and out on, with an Ash strip along the front edge....back edge is glued to the back panel..

And..a view from the Top..
   
Finish?   one coat of Minwax Special Walnut,  2 coats of Amber Shellac,  and one coat of Minwax Warm Gloss...Shellac and varnish were rubbed down with 0000 steel wool.

Client took ONE look at it, picked it up..and RAN to her car.  To say that she LOVED it, would be an understatement, and she also locked the car, before returning to the house.  She is the Girlfriend of a Grandson, and they were at his mom's house, as we were having a Christmas Gift Exchange, and Supper...(Ate too much...hour+ drive each way...I get a $100.00 Lowes Gift Card, and a Swiss Army Knife...)

Thanks for looking in, and have a happy Holidays..
Show me a picture, I'll build a project from that
Reply
#14
Most excellent Bandit. Had to feel good to see the joy of the recipient. Glad you had a good Christmas.
Thanks for sharing all your projects here and other places as well. Great gift for me to follow along.
Blessings going into the New Year.
If you continue to cut corners, you'll end up going in circles!

It's my thumb so I'll hit it if I want to!
Reply


Forum Jump:


Users browsing this thread: 1 Guest(s)

Product Recommendations

Here are some supplies and tools we find essential in our everyday work around the shop. We may receive a commission from sales referred by our links; however, we have carefully selected these products for their usefulness and quality.