12-27-2019, 12:39 PM
(This post was last modified: 12-27-2019, 01:13 PM by BrokenOlMarine.)
Recovering from the shoulder surgery has been torture, since I have had to mostly sit in the house and watch the world go by, other than going to therapy a couple times a week. But, there was light at the end of the tunnel. I knew I was going to see the doc on the 11th of December and HE is a woodworker as well, so I asked if I could get back in the shop if I was careful.
He has been my guy for thirty years and we KNOW one another. He knows I will do what he says, and he said I could get back to work in the shop, and to let PAIN be my guide. Don't shy away from it... but certainly don't over do it. Be careful not to strain yourself. You can't damage the work we did, no worries there. But you can over stress the areas, cause pain that will set back your recovery, and cause scar tissue that will greatly limit the range of motion, the most important aspect of my recovery right now.
I went back into the shop and cut a few more strips of Walnut, Maple, Purple Heart, and took a couple slabs that I had used to make a rack in the gun safe before I built the new cabinet, and cut those into strips since I really liked the grain. I think I remember someone telling me it was pecan. Just bending down to hook UP the dust collector to the table saw made the shoulder scream, so I was NOT long for the shop that day. Cutting the strips was ALL I got done. Then I had to take a couple days off.
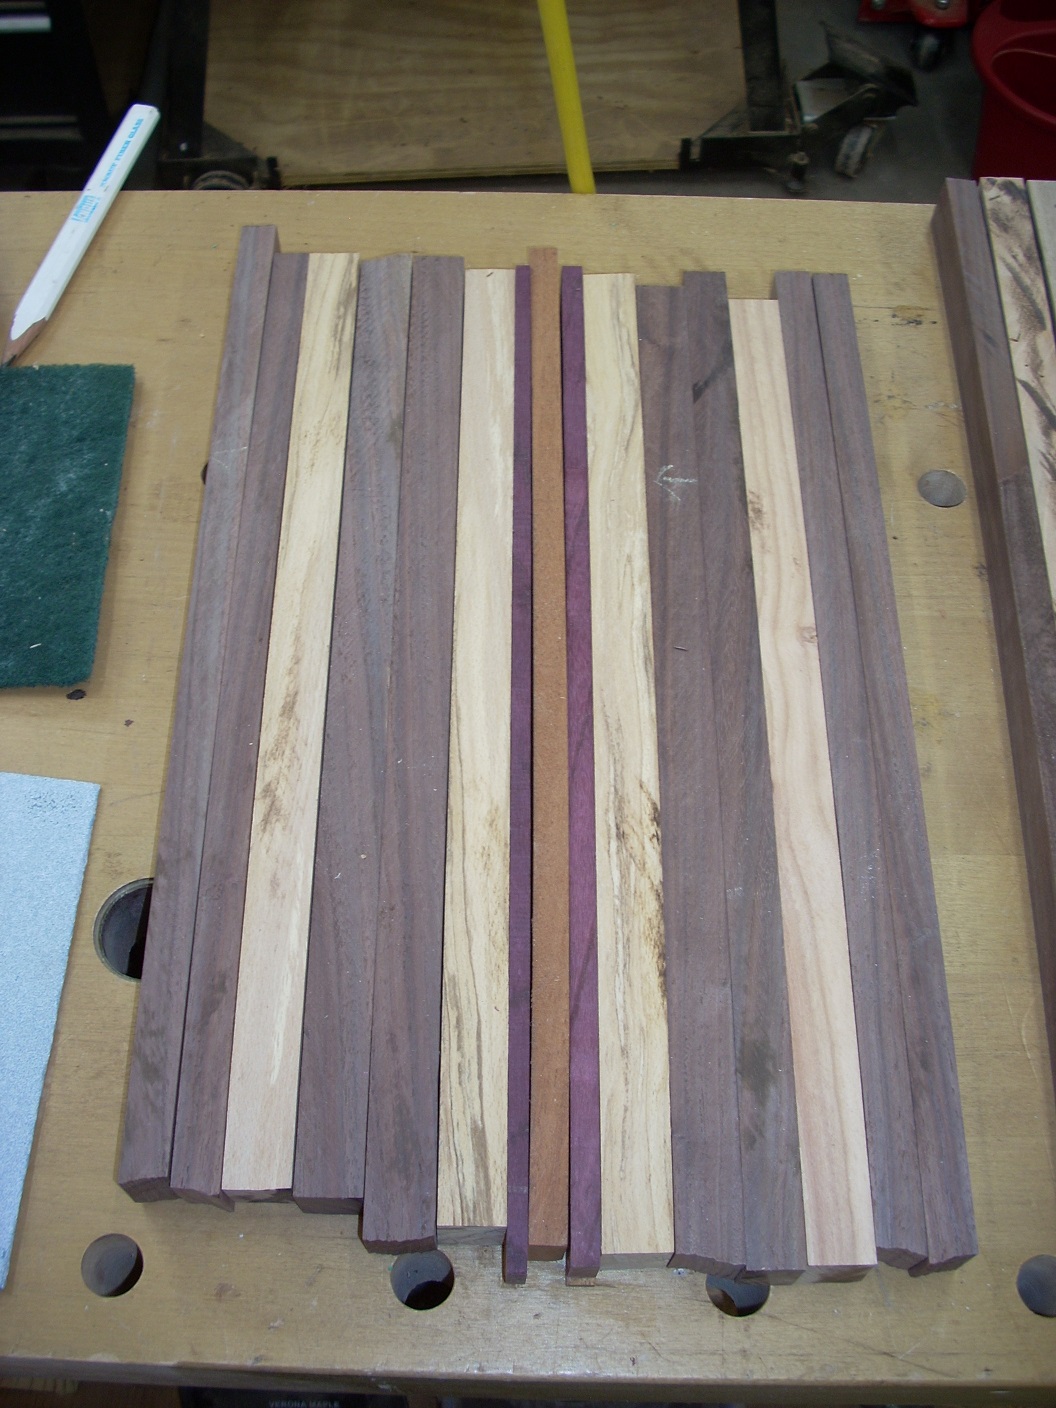
Back at it a couple days later, I checked the strips and they were going to need some love and care. They all went across the jointer, and many went back across the table saw to insure they were square. I then did a test layout and added clamp pressure. Hmmm. Need some tune up here and there. I measured width and needed some width on both the layouts. I took the purple heart leftovers, which were too short, and added some spacers to the bottom, then left them to dry overnight. I was being told none to subtlety that I was done for the day.
Came back out and took the strips out of the clamps and found that I needed to trim the sides. TOO thin for the jointer or the planer. Hand plane was what was needed here.


Beautiful hand plane and sharp as a razor, but, it still reminded me that I had a boo boo shoulder. I got the flats done on the two strips and they were good to go. No gaps or uneven edges between the mahogany and the purple heart. Test fitted the layouts and put them in the clamps and applied pressure.
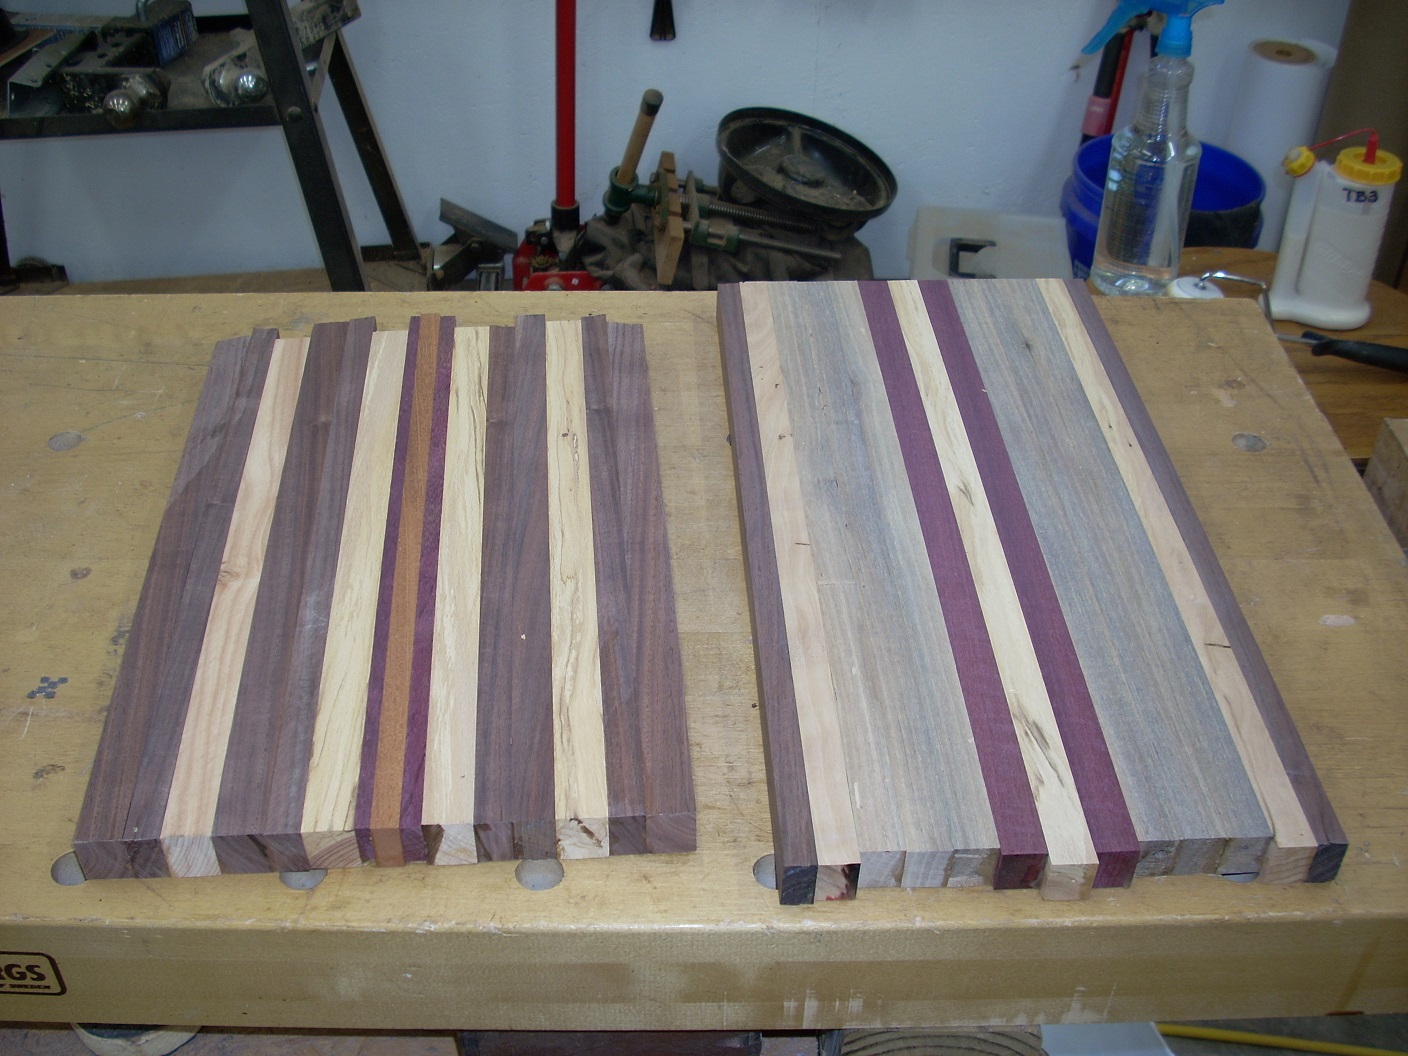
Layout one consists of Maple, walnut, and The two thin planed strips of purpleheart with a mahogany strip for accent down the middle.


layout two is Walnut, maple and pecan with thick Purpleheart accents down the center separated by a nice maple strip.
(I was told that is pecan, but with my memory, it's hard to be sure. Any input from the gallery? I am up for comments... )


After clamping pressure was applied to test the fit again, they were laid out, glued up and clamped, and left overnight. Thanks to lessons learned in the previous cutting board attempts, I have the Bessy Clamps to do the jobs right. Heavy, but they put even pressure on the projects.
Board one in clamps.... which needed a caul to keep it from flexing.


and two in it's clamps...


I came out the next morning and pulled them from the clamps and removed and put away the clamps, everything in their proper place.


After cleanup of the bench, I ran the two boards thru the planer to remove the glue and even up both sides. Next will come the shaping of the edges and ends and lots of sanding. I am pretty happy with the way they look so far, but can't wait for the payoff when the mineral oil makes them pop.


It has been great to get back in the shop, but I do lose track of time and have been spending more time in the shop than maybe I should. Pain. We are well acquainted. I have lost a bit of range of motion, but with hot showers and more PT than I had been doing I am back where I was. A couple days off and I'll be back in the shop, and back working... careful not to over do it. Really, I mean it... careful. (Yeah, lost in time in my element.) More hot showers....
He has been my guy for thirty years and we KNOW one another. He knows I will do what he says, and he said I could get back to work in the shop, and to let PAIN be my guide. Don't shy away from it... but certainly don't over do it. Be careful not to strain yourself. You can't damage the work we did, no worries there. But you can over stress the areas, cause pain that will set back your recovery, and cause scar tissue that will greatly limit the range of motion, the most important aspect of my recovery right now.
I went back into the shop and cut a few more strips of Walnut, Maple, Purple Heart, and took a couple slabs that I had used to make a rack in the gun safe before I built the new cabinet, and cut those into strips since I really liked the grain. I think I remember someone telling me it was pecan. Just bending down to hook UP the dust collector to the table saw made the shoulder scream, so I was NOT long for the shop that day. Cutting the strips was ALL I got done. Then I had to take a couple days off.
Back at it a couple days later, I checked the strips and they were going to need some love and care. They all went across the jointer, and many went back across the table saw to insure they were square. I then did a test layout and added clamp pressure. Hmmm. Need some tune up here and there. I measured width and needed some width on both the layouts. I took the purple heart leftovers, which were too short, and added some spacers to the bottom, then left them to dry overnight. I was being told none to subtlety that I was done for the day.
Came back out and took the strips out of the clamps and found that I needed to trim the sides. TOO thin for the jointer or the planer. Hand plane was what was needed here.

Beautiful hand plane and sharp as a razor, but, it still reminded me that I had a boo boo shoulder. I got the flats done on the two strips and they were good to go. No gaps or uneven edges between the mahogany and the purple heart. Test fitted the layouts and put them in the clamps and applied pressure.
Layout one consists of Maple, walnut, and The two thin planed strips of purpleheart with a mahogany strip for accent down the middle.

layout two is Walnut, maple and pecan with thick Purpleheart accents down the center separated by a nice maple strip.
(I was told that is pecan, but with my memory, it's hard to be sure. Any input from the gallery? I am up for comments... )

After clamping pressure was applied to test the fit again, they were laid out, glued up and clamped, and left overnight. Thanks to lessons learned in the previous cutting board attempts, I have the Bessy Clamps to do the jobs right. Heavy, but they put even pressure on the projects.
Board one in clamps.... which needed a caul to keep it from flexing.

and two in it's clamps...

I came out the next morning and pulled them from the clamps and removed and put away the clamps, everything in their proper place.

After cleanup of the bench, I ran the two boards thru the planer to remove the glue and even up both sides. Next will come the shaping of the edges and ends and lots of sanding. I am pretty happy with the way they look so far, but can't wait for the payoff when the mineral oil makes them pop.

It has been great to get back in the shop, but I do lose track of time and have been spending more time in the shop than maybe I should. Pain. We are well acquainted. I have lost a bit of range of motion, but with hot showers and more PT than I had been doing I am back where I was. A couple days off and I'll be back in the shop, and back working... careful not to over do it. Really, I mean it... careful. (Yeah, lost in time in my element.) More hot showers....
Jim in Okie
You can tell a lot about the character of a man -
By the way he treats those who can do nothing for him.
You can tell a lot about the character of a man -
By the way he treats those who can do nothing for him.


 These things happen. Luckily, it was at the end of the board and I didn't have to FILL it in.
  The one thing that is involved in Cutting Boards (and Bandsaw Boxes) is a lot of sanding. So... before I really get into the next phases of the Cutting Boards, I put them aside, and started...